Verbinde WEMALO with JTL
Authorisation
To be able to query the JTL API, you need to authorise yourself once. To do this, click on Shops → JTL Authorisation in the dashboard menu. Then click on the Authorise button.
The next step is to log in to JTL and confirm the displayed authorisations. As fulfilers, we can now query all customers assigned to us in JTL. Authorisation per customer is not necessary.


Add a new warehouse
How can a fulfilment warehouse from wemalo be connected to JTL FFN?
Add a new JTL Merchant
Prerequisite: The customer or the warehouse has submitted a request for collaboration in the JTL-FFN portal.
https://fulfillment.jtl-software.com/fulfiller/merchants The customer is requested via the Request customer to collaborate button.
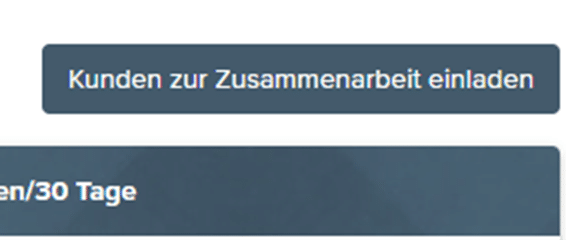
If the customer or warehouse has agreed to the collaboration, it is now possible to configure the JTL Connector in the dashboard setup.
JTL Connector configuration in the dashboard
As an administrator in the dashboard, click on Shops → JTL Connector in the menu.
Then select a customer/client from the drop-down menu on the left.
Existing merchants that are linked to the client are displayed in the dropdown on the right. To add a new one, enter the customer’s Merchant Profile ID assigned by JTL.

You can now select whether you are a sandbox customer. Then click on Install.

The merchant’s contact details are now displayed for verification. If these are correct, click on Confirm.

The merchant is now ready for configuration.
Configure JTL connection
The following steps can be carried out both as an administrator and as a customer.
Firstly, enter the Wemalo Connect token and click on Save.

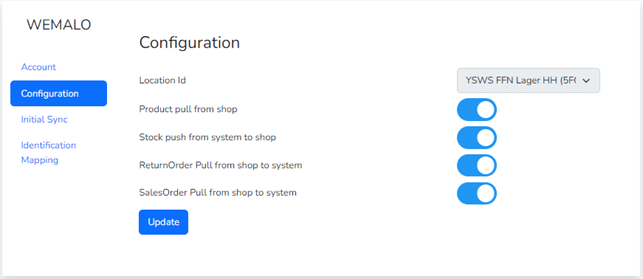
The warehouse to be linked to JTL can then be selected under Configuration.
You can also activate/deactivate the automatic synchronisation of products, orders, etc. The configuration is saved by clicking on Update.
Initial synchronisation
Release articles in JTL: https://guide.jtl-software.com/jtl-fulfillment-network/onlinehaendler-mit-jtl-wawi/artikeldaten-senden-und-aktualisieren/
The initial synchronisation must/can be started manually here so that you do not have to wait until the respective job starts in the background.
However, the synchronisation ‘Initial Sync Shipping Dispatcher’ MUST always be carried out manually so that the warehouse and dispatcher are transferred from Wemalo to JTL. If a new dispatcher is added in Wemalo, you must click Update again to transfer it to JTL. There is no automatic background job for this.

Identification mapping
JTL uses up to 8 identification numbers. In addition, GTIN and Taric are permanently linked to EAN and customs tariff number in Wemalo. Wemalo offers 3 further fields, EAN2-4, in which you can enter identification numbers as required.
In the following example, the manufacturer’s number is assigned to the EAN2 field. If this number is not stored in JTL, the number from the adjacent dropdown, ‘Hazard Identifier’, is tried as an alternative, and so on.

Known problems and what still doesn't work
- Shipping dispatchers removed in Wemalo remain in JTL. It may also no longer be possible to delete these if an order uses the dispatcher.
- Parts lists cannot be written
- There is no marketplace programme
- Item attributes are currently not available
- Container is not available
- No note is currently created for the stock change so that the customer knows why the stock has changed.
Incompatibilities
Packs in JTL only refer to the number of products contained, no dimension/weight can be specified. It is then necessary to create containers in Dashboard/Wemalo.
JTL documentation
Items from suppliers and wholesalers are often delivered in larger containers. In the Container area, you can enter a specific container quantity (number of items in the container) and your own container labelling, for example a different GTIN, for the selected item. The container will be posted to free goods receipts according to your specifications and added to your stock with the correct number of items.
https://guide.jtl-software.com/jtl-wawi/artikel/artikelstammdaten-sonstiges/#c-gebinde

