Connect Wemalo with PlentyMarkets
1. WHAT WEMALO CAN DO / Available Calls of our Interface
- Load product master data
- SKU
- Article name
- Dimensions
- Weight
- GTIN 13
- Pick up orders
- Invoice recipient
- Delivery address
- Article positions
- Delivery note
- Invoice
- Shipping profile
- Status changes adequate to the fulfilment process
- Stock transfer
- Physical stock
- Stock posting to the assigned warehouse ID
- Transmission of inventory entries: Incoming and outgoing postings
- Transmission of returns bookings: Traceable through order linking
- Transmission of the tracking ID after dispatch
2. Preparation & setup in plentymarkets
2.1 User account for REST API
- Log in to your plentymarkets system and open the section Institution
- Under Settings -> User, click on the menu itemAccounts
- Click on the “New” button to create a new user account
- A new window will open, please enter the following data:
- Username: Freely selectable user name
- Real Name: Name for better assignment in the plenty system, freely selectable.
- Access: Select REST API, so the user only has access to the API..
- Password: A password of your choice, which you then provide to us so that we can connect WEMALO to your plenty system..
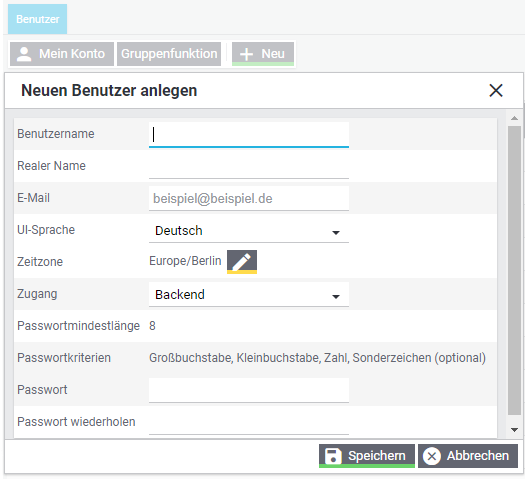
After you have saved the new user, it will appear in the user overview in your plentymarkets system. Then click on the newly created user to edit it for the next steps.
- Click on Permissions and set the following settings:
- Visible order status: All
- Settable order statuses: All
- Clients (shops): Select the client(s) for which articles and orders are to be transferred to YouSellWeSend.
- Click on Manage menu and REST API permissions (at the top of the page) and also set the following settings / permissions there:
- Article
- Orders
- CRM
- Marking
- Master data
- Stocks
To connect your plentymarkets system, we need the following data from you:
-NOTE-
Access to some data requires prior set-up as described in the next chapters. Please therefore continue with the following sections from 2.2.
- plentymarkets-ID: Located in the top right-hand corner next to the profile photo.
- plentymarkets URL: URL to the backend shop. Can be found by clicking on the plentymarkets ID in the upper area of the plentymarkets backend.
- username: User name of the user account just created.
- password: Password to the user account just created.
- warehouse ID: Settings -> Goods -> Warehouse -> Select warehouse -> Settings -> Warehouse ID
- storageLocationId: the ID of the default storage location in plentymarkets. Locations -> Select location -> Settings -> Location ID is displayed.
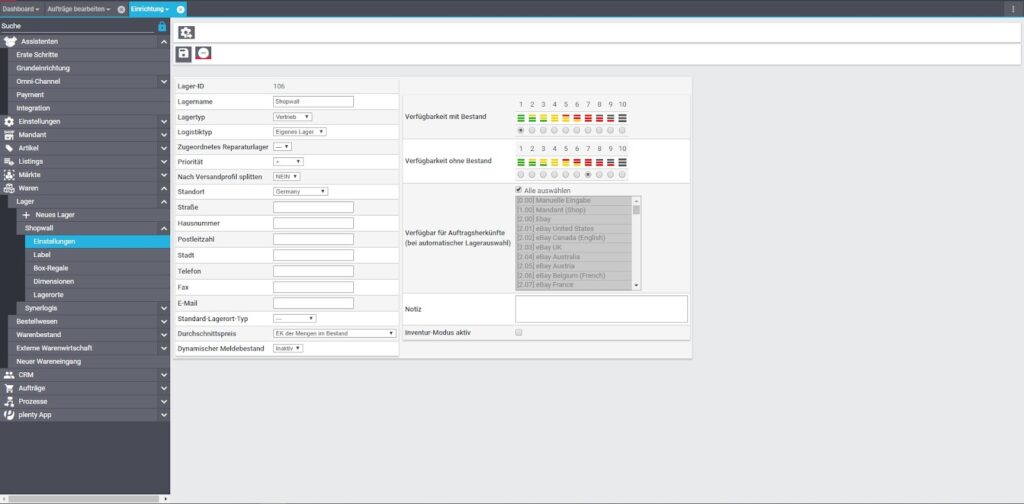
2.2 Setting up a warehouse
To define a fulfilment area for our warehousing, create a new warehouse for WEMALO.
→ Furnishing→Goods→Warehouse → New warehouse
We recommend Sales as the storage type, as it cannot be ruled out that otherwise there will be an impact on the availability and the net stock of goods.
-NOTE-
It is mandatory to select “Own warehouse” for “Logistics type”.
If several warehouses are created or already exist in plentymarkets, please refer to section 2.6 Automatic warehouse selection in orders.
The newly created warehouse automatically appears in the warehouse list of the navigation. There you will find the bearing ID that we need in the setup.
The following figure shows an example image-2.2.
2.3 Item settings
After creating an item, a main warehouse assignment can be made in the item settings. We recommend that you select the newly created warehouse here.
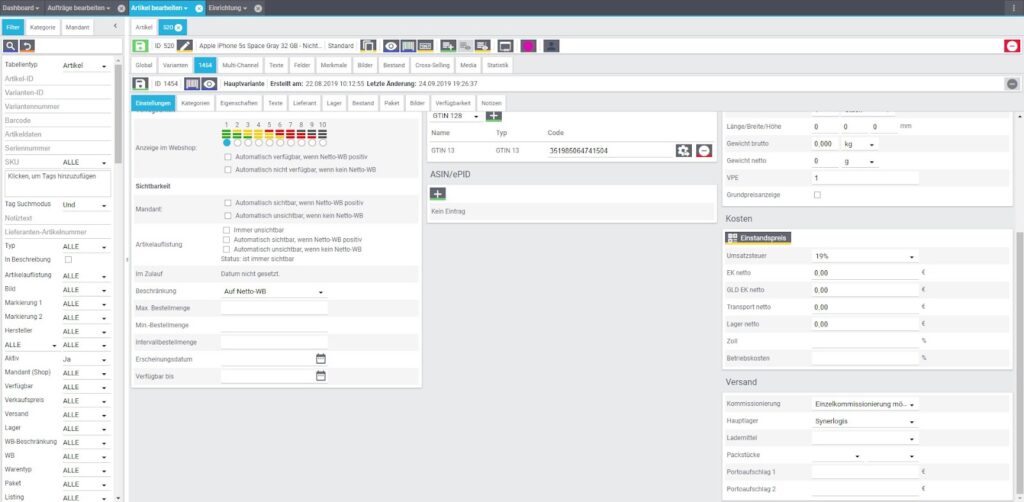
- Variant name (the name is composed of Name1 and Variant Name).
- Variant number (corresponds to the SKU and must be unique).
- GTIN 13 (to be assigned once and uniquely. Serves as a barcode for the warehouse).
- Availability: active.
- Dimensions: Gross weight, length/width/height.
-NOTE-
Items initially have no stock in the newly created warehouse. After goods receipt, the booked items are transferred to the plenty warehouse. You are now able to have orders fulfilled by WEMALO.
If plentymarkets is not also used for its own warehousing, WEMALO transfers item stocks to plentymarkets in bin 0 by default.
2.4 Set up event actions.
The basic principle of event actions in plentymarkets is simple: certain events in the system trigger certain actions These are necessary to ensure that, for example, an order sent by WEMALO is automatically set to the “Sent” status in plentymarkets and the stock is thus correctly booked out.
You can find the configuration of the event actions in plentymarkets under:
→ Setup→Orders→Events.
Select “New event” in the lower area and then “Create new event action”. Select “Order change→Package number” as the event and give it a name of your choice, which will only serve for better allocation in the system later. If this event is to refer exclusively to orders of the WEMALO warehouse, please define a filter “Sender warehouse” and select the corresponding warehouse.
After an event has been created, it must be assigned to an action.
To do this, click on “Action +” and select “Order→Book goods issue“.
As soon as a consignment number is transferred to the order, plentymarkets now automatically posts the goods issue and also sets the order to the “shipped” status in plentymarkets.
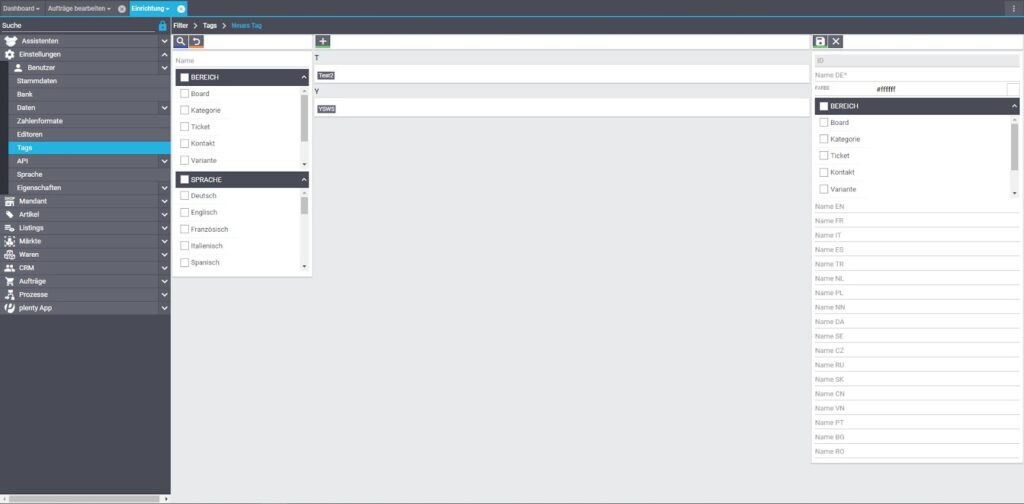
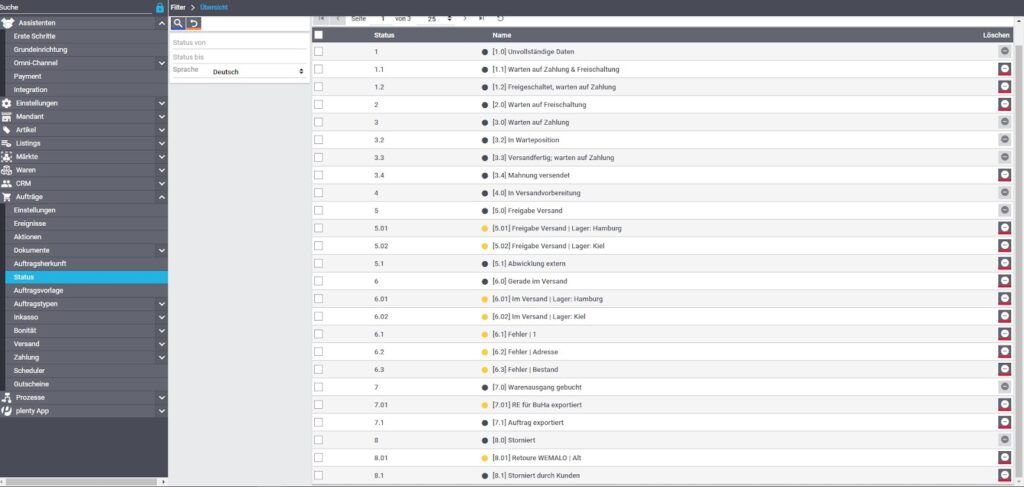
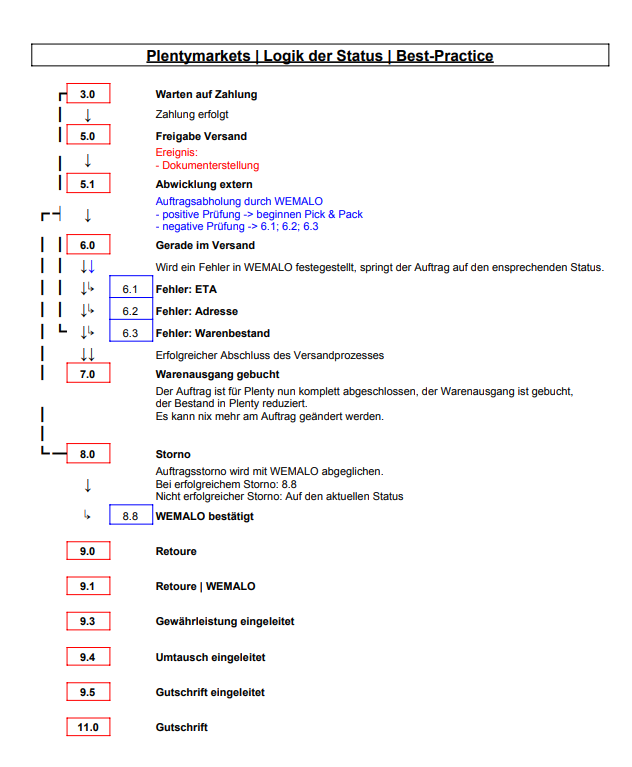
2.5 Setting up status
The process progress of an order is broken down by status in plentymarkets. For synchronisation, it is necessary that the corresponding statuses in plentymarkets and WEMALO match.
2.5.1 Open orders
By default, new orders are retrieved in status 5 (release for dispatch). Alternatively, a separate status can be defined. After the order has been transmitted to WEMALO, the status is set to 5.1 (external processing). From this point on (status 5.1), changes made in the order are no longer transmitted to WEMALO, and changes to order items or customer data are therefore not taken into account.
2.5.2 Faulty orders
If orders lead to an error message due to incorrect entries or similar, these are indicated by a corresponding status:
If address data is incorrect, the status 6.2 is set.
If there are not enough goods, the status is set to 6.3.
2.5.3 Cancelled orders
By default, cancelled orders are set to status 8.0 in plentymarkets. After successful transmission to our system, WEMALO sets the status to 8.8.
If the corresponding order has not yet been processed in the warehouse, the order is cancelled and the ordered items are returned to stock. However, if the order is already being processed, cancellation is no longer possible. (Attention: Status 8.8 is currently set anyway…)
2.5.4 Returned orders
WEMALO is able to transmit returns on a field predefined by the customer. By default, plentymarkets uses status 9.0 for returns. Due to this, we recommend using status 9.0.1 for returns that are processed via WEMALO in order to be able to better differentiate which platform/service provider made the corresponding booking./p>
2.5.5 Dispatched orders
As soon as WEMALO has processed an order ready for dispatch, it is marked in plentymarkets with the tracking number of the service provider. Both the tracking number and the shipping service provider are transmitted.
-OVERVIEW-
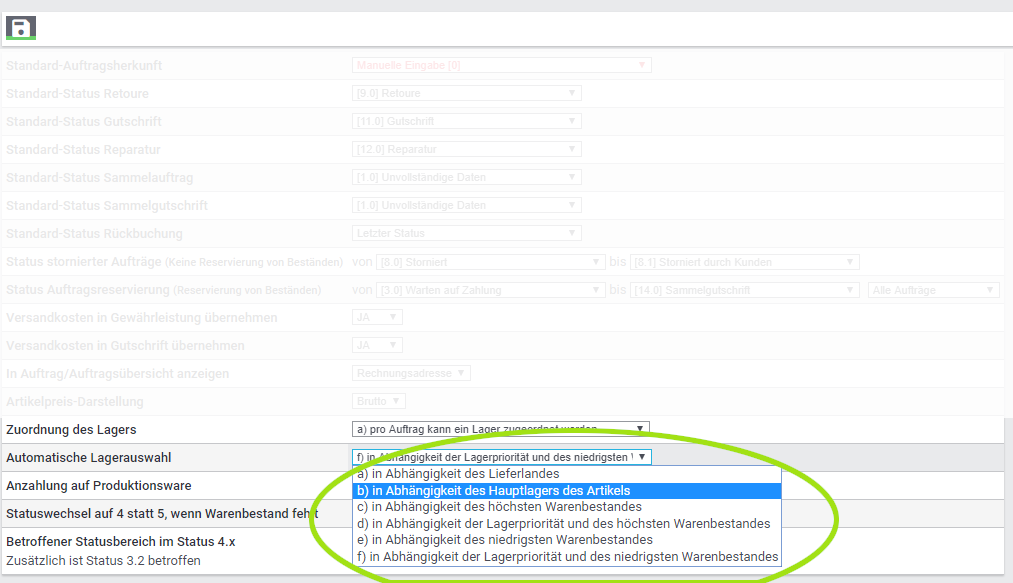
2.6 Automatic stock selection in orders
If several warehouses are created in plentymarkets, a setting for automatic warehouse selection in orders is necessary.
If multiple warehouses are created in plentymarkets, a setting for automatic warehouse selection in orders is necessary.
→Setup→Orders→Settings.
We recommend the setting b) depending on the item’s main warehouse to assign the warehouse based on the item’s setting. Orders with items whose main warehouse is the created WEMALO warehouse are thus automatically assigned to the correct warehouse, which ensures correct reservation and booking out of stocks.
.
3. Things to consider/ common mistakes/ nice to know
For individually assigned statuses, it is advisable to deepen the numbering instead of continuing it numerically in order to maintain scalability and to be able to add further statuses later. (e.g. 9.01 instead of 9.1; 9.02 instead of 9.2 etc.)