Connect WEMALO with Billbee
1. Create client in WEMALO for Wemalo-Connect
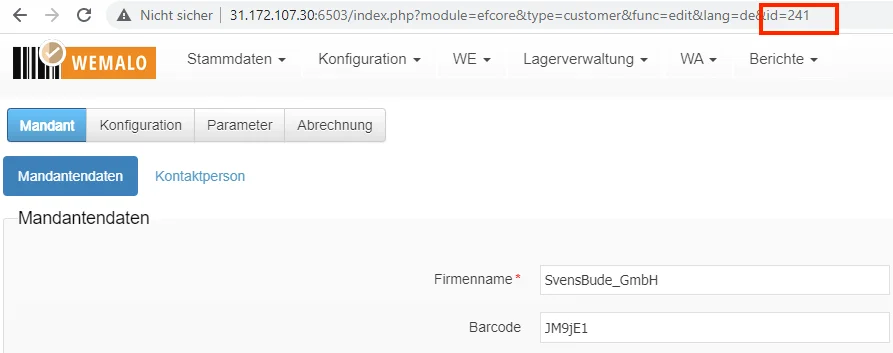
First create the client in Wemalo, as the client number is required. This serves as the client ID in YSWS connect.
It is sufficient to simply create the client. As a rule, no further data needs to be filled in during this step. See also the Wemalo documentation. We will work on the other Wemalo settings later.
We then find the client number at the top of the client’s URL. (The following figure shows an example screen-1)
2. Bilbee setup for Wemalo-Connect
Create clients in connect:
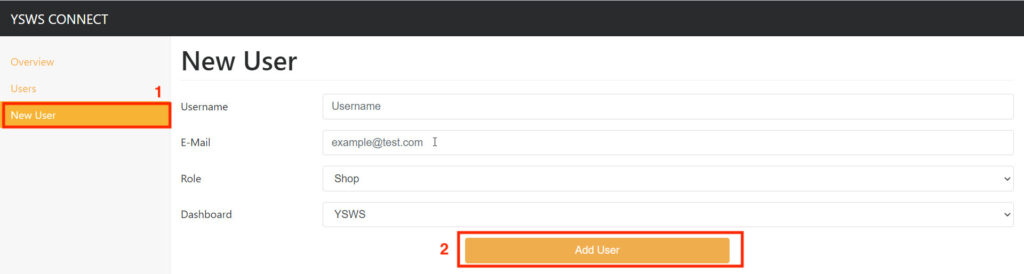
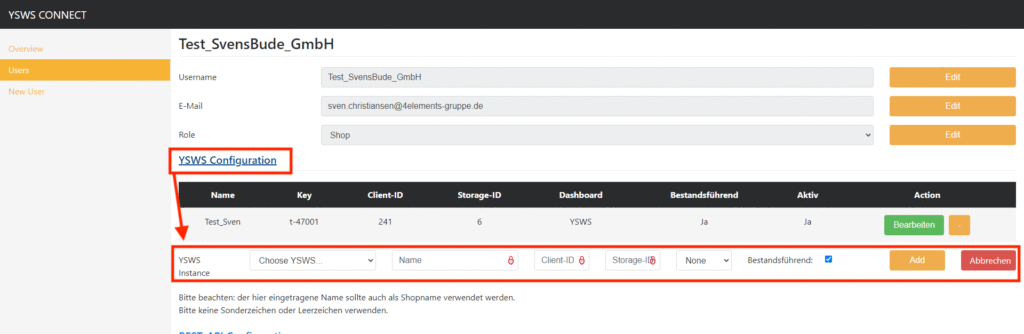
2.1 New User
1. create a new user in Connect at
https://connect.wemalo.com/user/new
- Username: Assign customer name.
- E-mail Customer e-mail.
- Role: Select “Shop”.
- Dashboard: Select “WEMALO”. 2.
Then click “Add User” (the following figure shows an example image-2.1).
2.2 Click YSWS Configuration. The settings
- YSWS Instance: Select the instance here. Will be saved under Key.
- Name: Please note: the name entered here should also be used as the shop name. Please do not use any special characters or spaces.
- Client-ID: See step 1 (Create 1st client in WEMALO for wemalo-connect).
- Storage-ID: Read out the storage ID from Wemalo.
- Dashboard: Select Dashboard. Select “YSWS”.
- Inventory management: Check the box here.
- Finally click “Add”
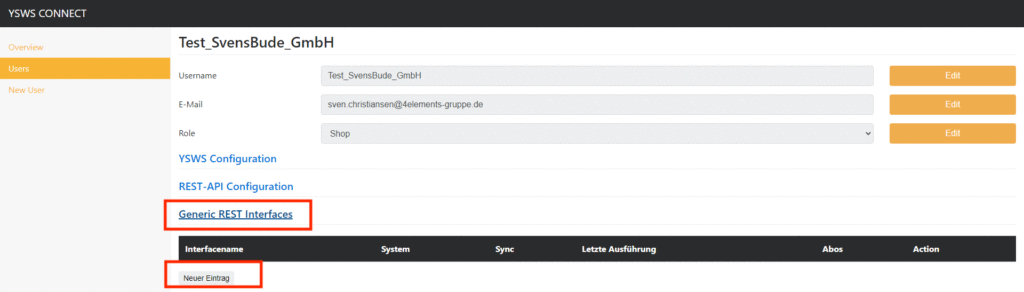
2.3 Set up Billbee interface via Generic REST Interfaces
- Click Generic REST Interfaces → then “New entry”.
The following figure shows an example image-2.3
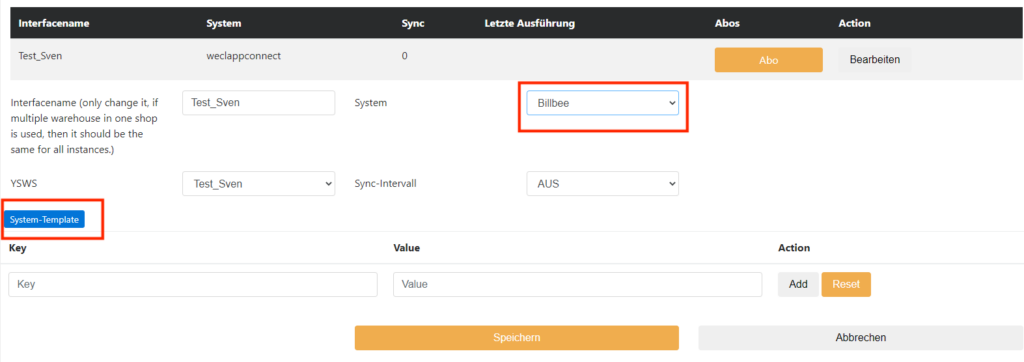
2.3.1 Under "System" we select "Billbee".

2.3.2 Then we click System Template
- In this way, we create the necessary key-value pairs for storing the required settings (URL, password, apikey etc. see next step).
The following figure shows an example image-2.3.2
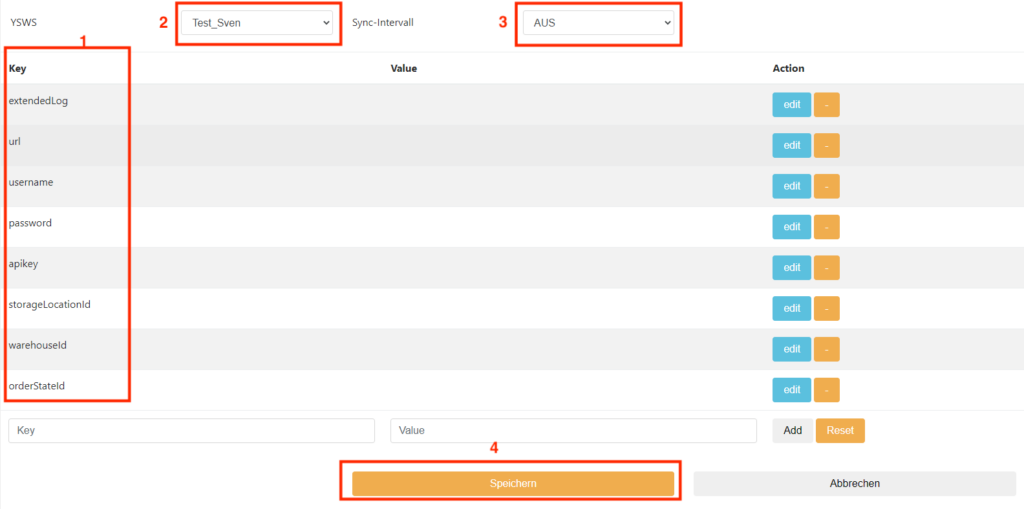
2.3.3 Key-value pairs and other settings.
- The created key-value pairs for Billbee.
- Select theWemalo instance we have created.
- Select the synchronisation interval of the shop. (As long as the setup is running, it is best to leave this set to OFF).
- We save and create the key-value pairs.
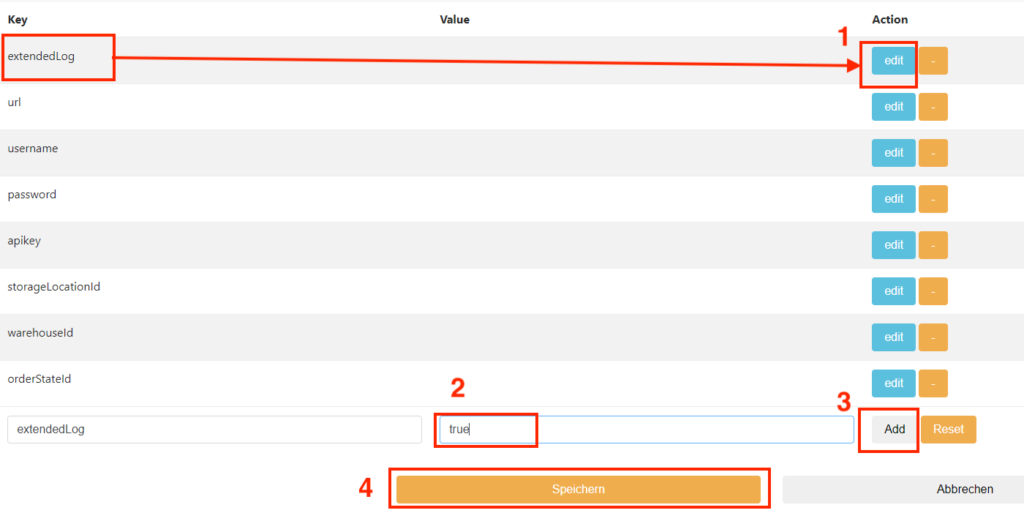
2.3.4 Edit Key-Value Pairs (Example extendedLog)
- extendedLog → “edit” click.
- Set the value to “true” or “1”.
- Click “Add”.
- “Save”.
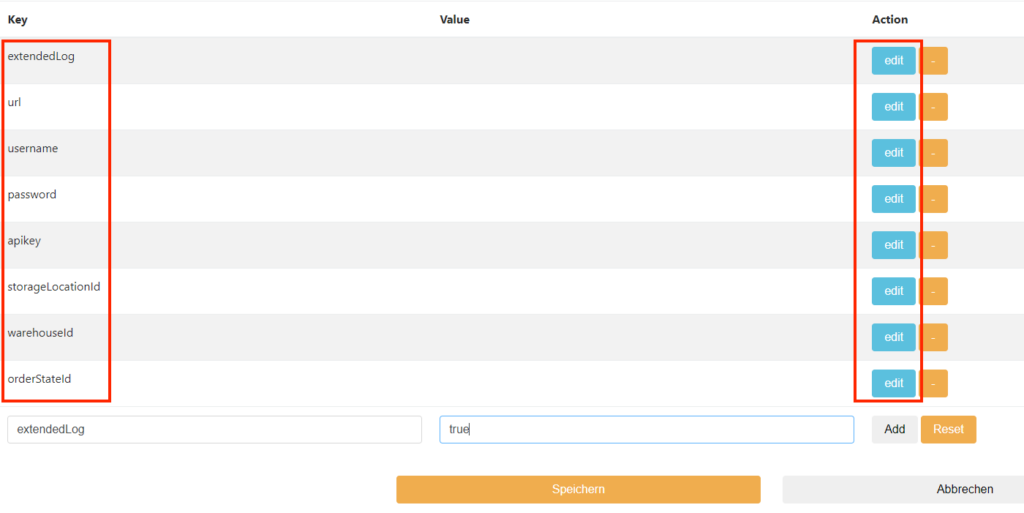
2.3.5 Edit the other Key-Value pairs
The other key-value settings are read from the table in 2.3.6 and edited by the client as in the previous step “extendedLog”.
The following figure shows an example image-2.3.5
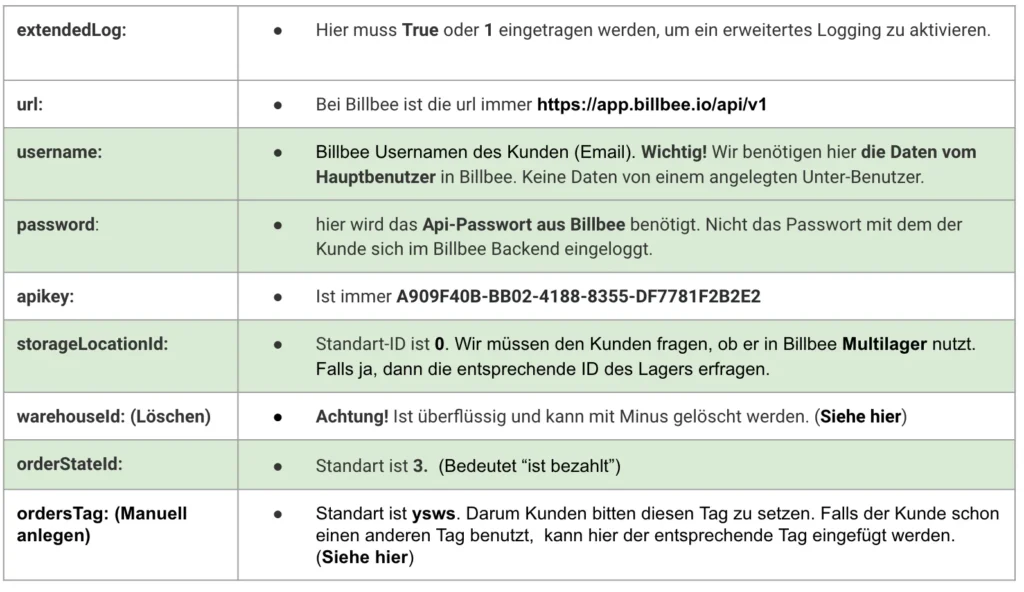
2.3.6 Key-Value pairs. The required settings (green data is provided by the client)
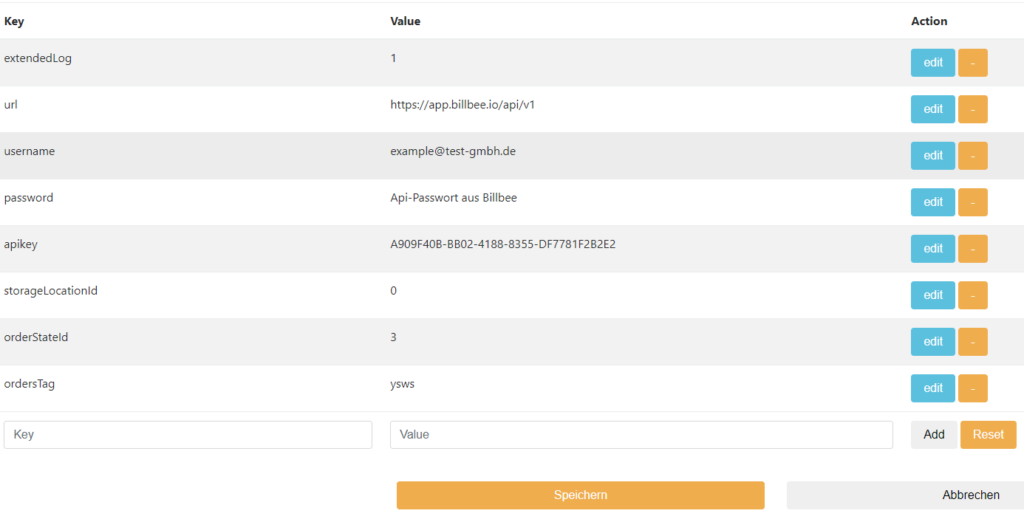
2.3.7 Key-Value Pairs. The required settings in the example image 2.3.7
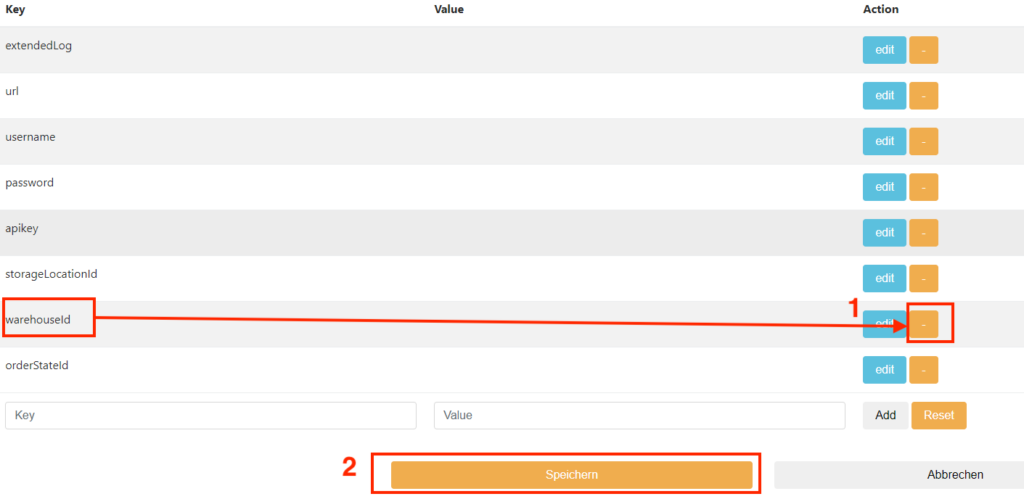
2.3.8 Delete Key-Value Pairs "WarehouseId"
- Under warehouseId click the “minus” symbol.
- Click “Save”
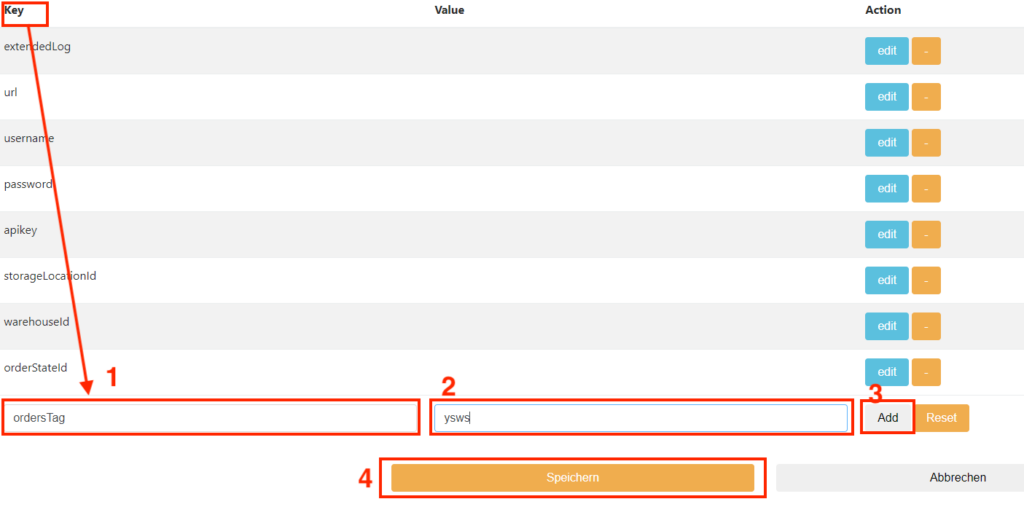
2.3.9 Key-Value pairs. Insert "ordersTag" manually.
- Insert subkey “ordersTag”.
- Enter ysws as an example.
- Click “Add”.
- Click “Save”.
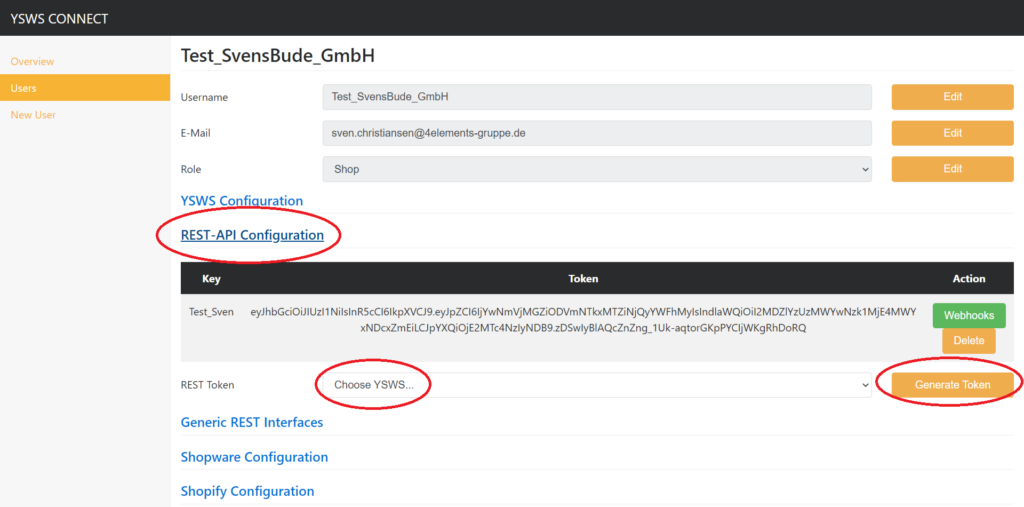
2.4 Create REST Token
REST Token: Select the configured instance at Choose YSWS and click Generate Token.
The following figure shows an example image-2.4
2.5 Subscriptions → Synchronise products with Wemalo
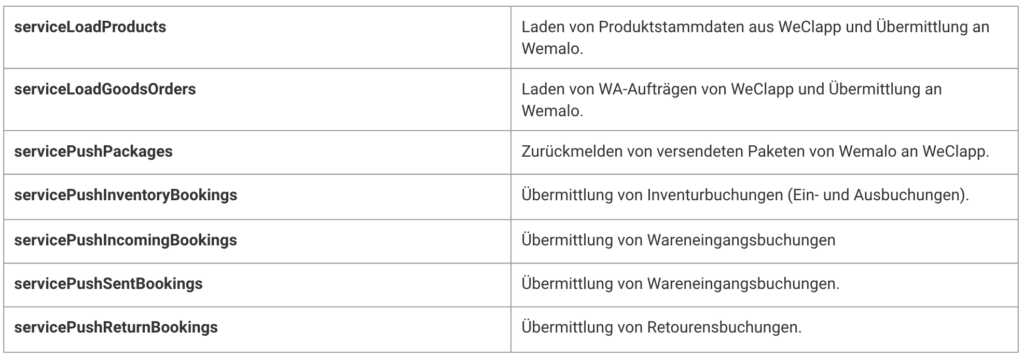
2.5.1 Activate subscriptions
Under Generic REST Interfaces we have now connected our shop. To activate or create subscriptions, we click “Subscription”.
The following figure shows an example image-2.5.1(1)

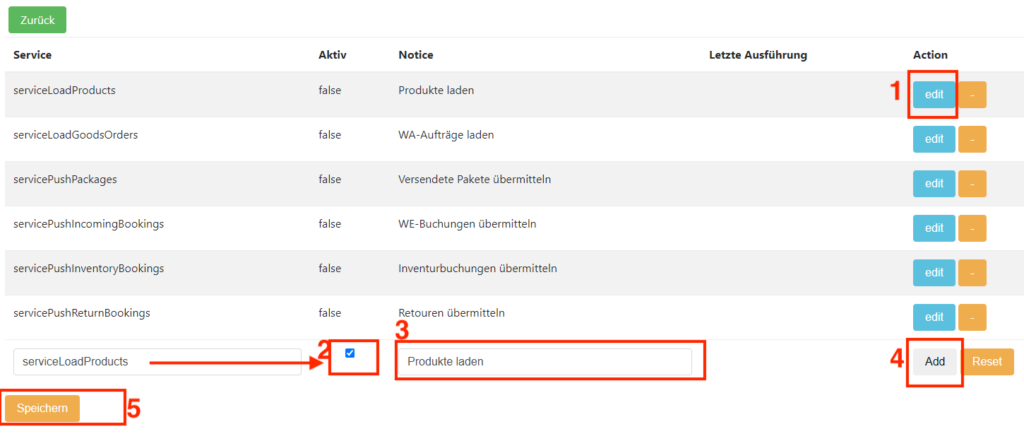
- Select the desired service and click “edit” → For example “serviceLoadProducts”.
- With the checkmark we set our subscription to active (true) → No checkmark means inactive (false).
- Notes on the subscription are stored in Notice.
- With “Add” we set our subscription to active (true).
- Finally, click on “Save”.
The following figure shows an example image-2.5.1(2)