Connect WEMALO with Shopware 5
Connect with Shopware 2.5
1. Create client in WEMALO for Wemalo-Connect
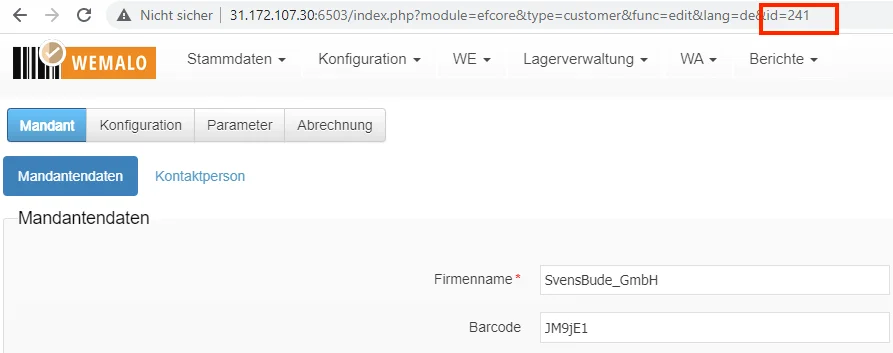
First create the client in Wemalo, as the client number is required. This serves as the client ID in YSWS connect.
It is sufficient to simply create the client. As a rule, no further data need to be filled in during this step. See also die Dokumentation zu Wemalo. We will work on the other Wemalo settings later.
The Client number finden wir dann oben in der URL des Mandanten. (Die folgende Abbildung zeigt ein Beispielbild-1)
2. Shopware setup for Wemalo-Connect
Create clients in connect:
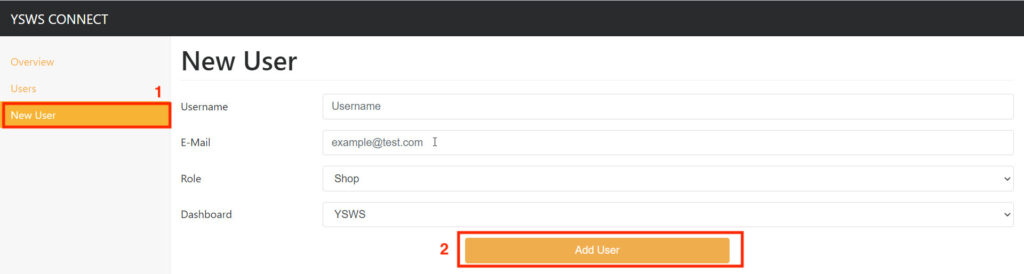
2.1 New User
1. create a new user in Connect at https://connect.wemalo.com/user/new
- Username: Assign a customer name.
- E-mail Customer e-mail.
- Role: Select “Shop”.
- Dashboard: Select “YSWS”.
2. Then click “Add User” (the following figure shows an example image-2.1).
2.2 Click YSWS Configuration. The settings
- YSWS Instance: Select the instance here. Will be saved under Key.
- Name: Please note: the name entered here should also be used as the shop name. Please do not use any special characters or spaces.
- Client-ID: See step 1 (Create 1st client in WEMALO for wemalo-connect).
- Storage-ID: Read out the storage ID from Wemalo.
- Dashboard: Select Dashboard. Select “YSWS”.
- Inventory management: Check the box here.
- Finally click “Add”
The following figure shows an example screen 2.2.
2.3 Shopware-Konfiguration
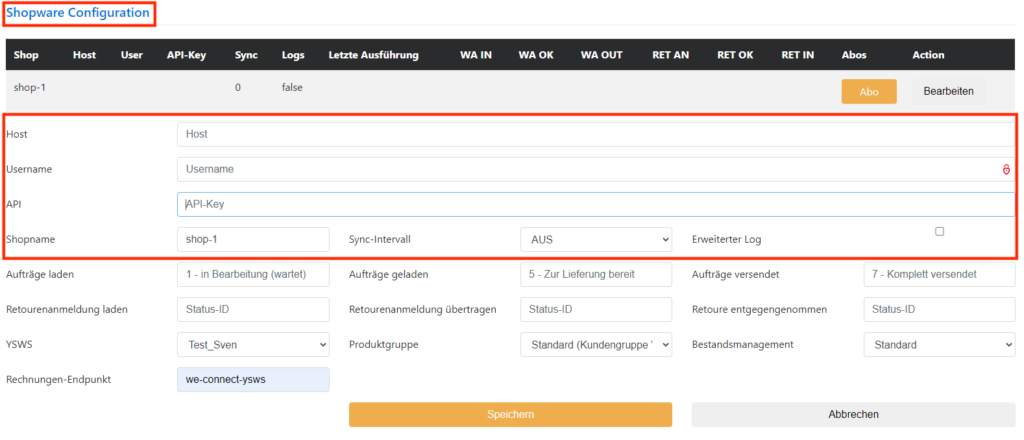
2.3.1 Shopware Configuration → The Settings 1
- Host: Enter the current Shopware address here (URL).
- Username: The username from Shopware>.
- The API key from Shopware.
- Shopname: We assign a shop name
- Sync interval: How often should the shop be synchronised?
- Extended Log: can be omitted in the standard.
The following figure shows an example image-2.3.1
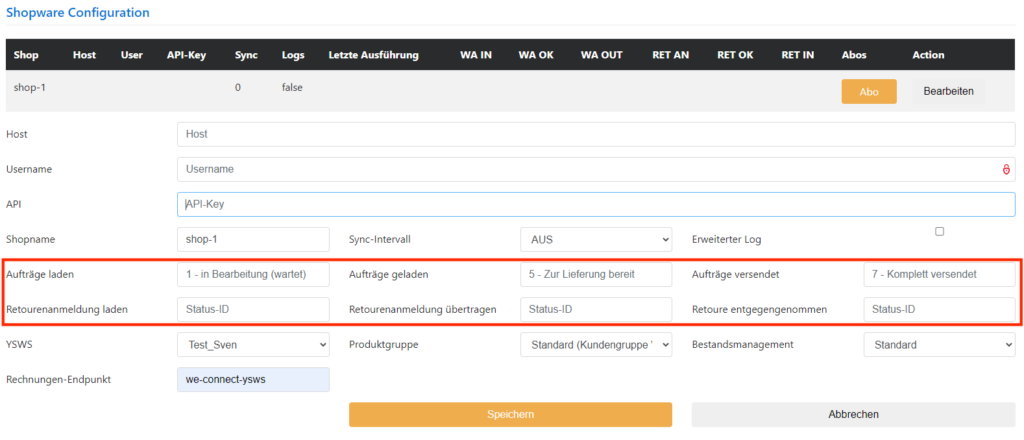
2.3.2 Shopware Configuration → The Settings 2
- The status ID information for “Load orders”, “Process orders”, “Orders sent”, “Load returns registration”, “Transfer returns registration”, “Returns accepted”.
- Here the placeholders must be set by the respective status ID from Shopware. In the example, “Load orders” gets the status ID “1”. These IDs must be read from Shopware.
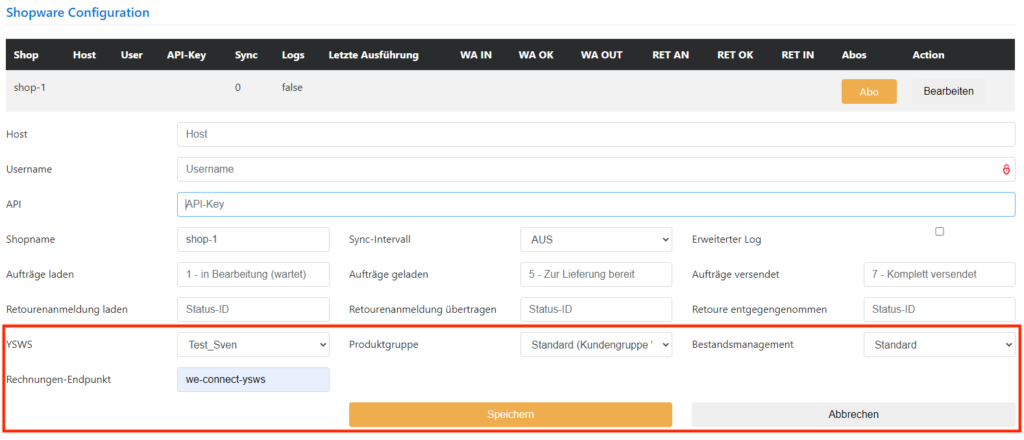
2.3.3 Shopware Configuration → The Settings 3
- YSWS: We select our generated instance.
- Product group: From which product group should products be loaded. To be set in Shopware.
- Inventory management: Select standard or Pickware.
- Invoice endpoint: Invoices can be created here via a plugin. For example, the plugin Order Documents API (only for Shopware 5).
- “Save” at the end
The following figure shows an example image-2.3.3
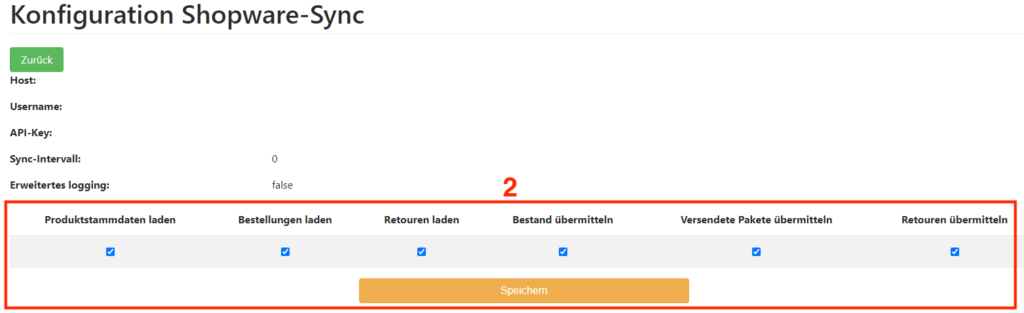
2.4 Subscriptions → Synchronise products with Wemalo
-
- In “Shopware Configuration” click in “Subscription”.
- Then we check the boxes for “Load product master data”, “Load orders”, “Load returns”, “Transmit stock”, “Transmit shipped packages”, “Transmit returns” and “Save”.

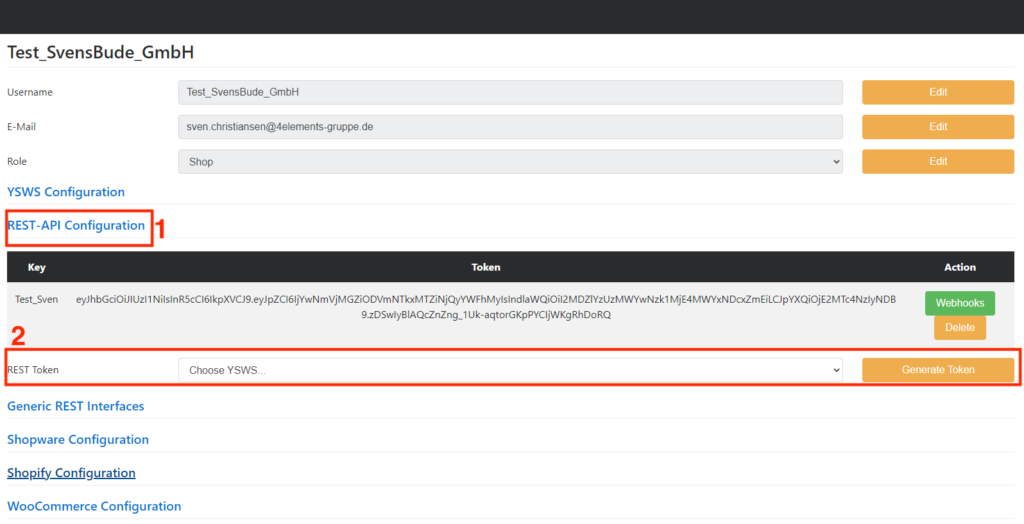
2.5 Create REST Token
- Click on “REST-API Configuration”.
- REST Token: At Choose YSWS, select our created instance from the YSWS Configuration and click “Generate Token”.
The following figure shows an example image 2.5.